Cutter
|
Introduction
The tutorial
Cutter: Slim Template Scripts
explaines how Cutter can automatically generate a Slim node from a RSL function
implemented in a .h file. This tutorial outlines Cutters ability to also
automatically produce a HyperShade node script from a RSL function.
HyperShade node scripts, implemented in .h files, are explained in detail in the
Pixar document, |
Setting Up Cutter's PreferencesThe most important preference to be set by the user is the path to the directory in which RenderMan_for_Maya.ini will source the users custom HyperShade node scripts. For example, suppose a directory named RfM_hypershade will store the custom (.h) node files, say, /Users/john_doe/Documents/maya/projects/RfM_hypershade The same path should be entered into Cutter's Languages/Slim panel. The preference named "Base ID" will be explained later.
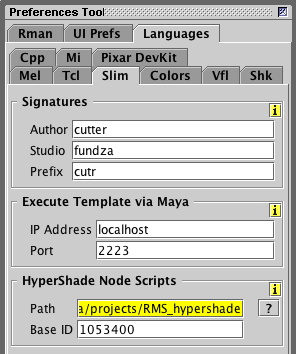
Although scripts for Slim nodes are not the same as those for HyperShade their structure is sufficiently similar to warrant the preferences for Cutter's HyperShape node capabilities to be "bundled" with the general Slim preferences. |
Creating a Custom Node from a RSL FunctionThe RSL function given in listing 1 will be used to demonstrate Cutter's ability to automatically generate a HyperShade node script. Listing 1 (SwapComponents.h)
Step 1 - function selectionSelect (only) the text of the function. Ignore any #includes that may be specified in the file - these will be recognized automatically by Cutter. Right mouse click and choose "Export as HyperShade Node".
Step 2 - function conversionCutter will open a window containing the text for the node - listing 2. The large commented block of XML code contains instructions that will be read by Pixar's code generator when cutrSwapComponents.h is sourced by RenderMan_for_Maya.ini. |
Listing 2 (cutrSwapComponents.h)
|
Step 3 - unique node ID
Edit the value of the item |
Step 4 - deploying the node script
This section assumes the user has established a directory structure intended to store
scripts that will be sourced by RfM. For details refer to, |
# rfm_nodeid 1053400 LoadExtension rslt PATH_TO_/cutrSwapComponents.h RAT::LogMsg INFO "cutrSwapComponents has been loaded" |
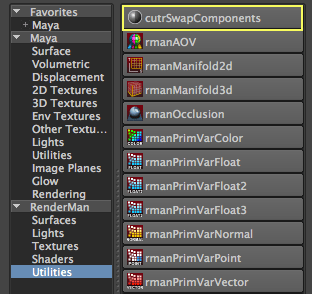
Step 5 - custominzing the node interfaceMake sure the RfM plugin is loaded. In HyperShade locate the new node.
The interface for the node is artist-unfriendly because the UI widget for the parameter "comps" should be a dropdown menu, not a slider.
As explained for Slim nodes in the tutorial Cutter: Ui-Hints for Slim ui-hints can be used to adjust the UI. As an example, consider what happens when ui-hints are assigned to the comments of the parameters of the original SwapComponents.h. void SwapComponents ( color c; /* [label "Input Color" default "0.2 0.7 0.4"] */ float comps; /* [label "Reorder Components" rbg gbr brg bgr 0 1 2 3] */ output color result) When Cutter creates a new version of cutrSwapComponents.h it will write additional information into each parameter block. For example. parameter color c { label {Input Color} default {0.2 0.7 0.4} } parameter float comps { label {Reorder Components} subtype {selector} range {"rbg" 0 "gbr" 1 "brg" 2 "bgr" 3} } The interface in Maya will reflect the changes.
|
© 2002- Malcolm Kesson. All rights reserved.