Figure 1
Cutter
|
Overview
The "Rif Tool" is intended to make it easier for plugin developers to debug their
rifs. Pixar's documentation that outlines the use of rif plugins written in C++ can
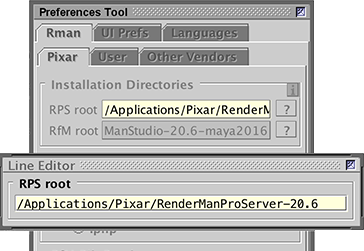
be found here, Cutter - Check the Path to RPS
Assuming the reader has successfully created the Particles plugin for their operating
system - |
|
|
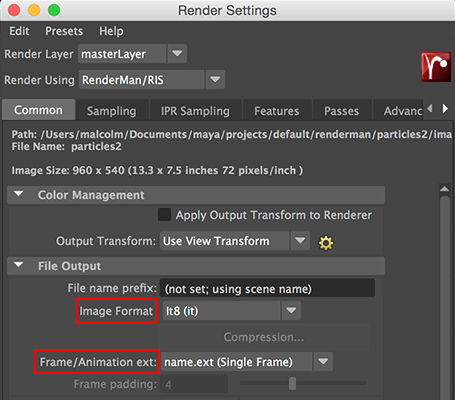
Maya - Generate a Rib of a Particle SystemSet a project and create a particle emitter and generate a stream of particles. Assign the PxrDisney material to the particles. Save the scene. In the "Common" tab of the Render Settings window ensure the "Image Format" dropdown menu is set to "It8 (it)" or "It16 (it)". Also, check the "Frame/Animation ext" is set to "name.ext (Single Frame)" - figure 2.
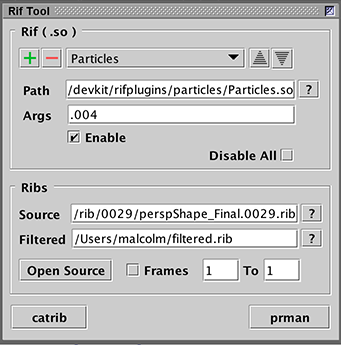
In Maya's script editor execute the following Mel command. Using the "Rif Tool"Open the tool from the Tools menu. In the "Rif" panel use the browse button "?" to identify the rif (Particles.so or Particles.dll). In the "Args" field enter a value such as 0.004. In the "Ribs" panel point the "Source" text field to the Maya rib. In the "Filtered" text field enter the path to an output rib file - figure 4.
Before testing the Sides filter open the source rib using the "Open Source" button and remove the following line of text. ##rifcontrol insert begin -rif RLFInjector -rifend Otherwise, the error shown in figure 5 will be reported.
Save the changes made to the source rib and then click the "catrib" button. Use the "Open Filtered" button to inspect the rib. All instances of Sides should have a value that corresponds to the "Args" text field. |
Using the Rif with MayaOpen the Render Settings window and select the Advanced tab. In the Ri Filters panel click "New Rif" and use the directory browse button to find Sides.so. In the "Rif Args" text field enter the value 1 - figure 6.
Figure 7 shows the same scene rendered with the args value set to 1 and 2.
|
© 2002- Malcolm Kesson. All rights reserved.