Introduction
The RifPlugin presented here converts polymesh geometries to
wireframes consisting of loops of RiCurves. It does so by using the "P" vertex data of a mesh or subdiv to define
one curve for each face of the original surface. By default the rif has no effect on the
way that polymesh and subdiv surfaces are rendered. However, by assigning
a custom attribute to any polymesh/subdiv surface in a Maya scene one of three effects
can be achieved, namely,
			    Attribute "user" "int wireframe" [0]  // no effect (default)

			    Attribute "user" "int wireframe" [1]  // convert to curves

			    Attribute "user" "int wireframe" [2]  // base surface + curves
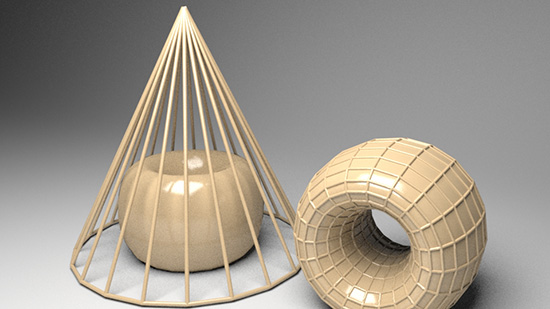
Figure 1 Rollover
With and without wireframe rendering
The width (diameter) of the curves can be set as a "Rif Arg".
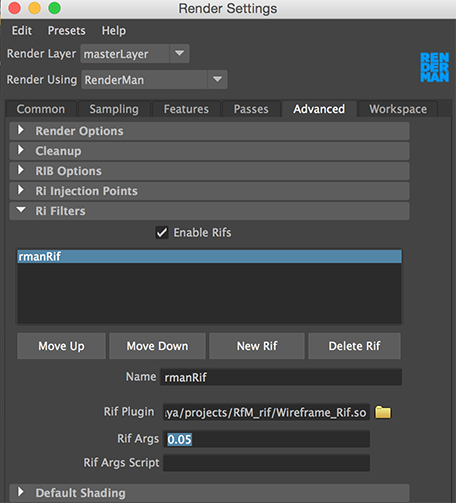
Figure 2
Compiling the RifPlugin
Follow the instructions in the tutorial,
"Cutter: Compiling and Building Plugins"
Assinging the Custom Attribute
Go to the shape tab of a polymesh add "Manage Attributes...".
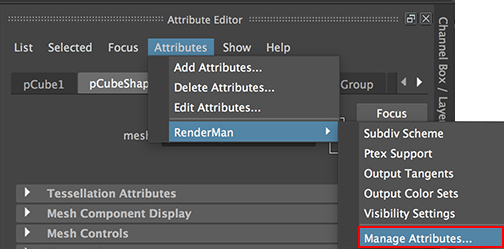
Figure 3
From the list of available attributes choose "Pre Shape MEL".
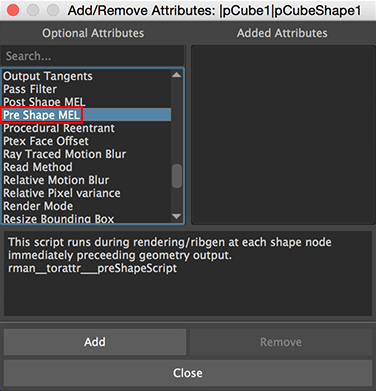
Figure 4
In the "Pre Shape MEL" text field enter the following MEL command,
RiAttribute("user", "int wireframe", 2);
A value of 0 will indicate to the RifPlugin the mesh should be rendered normally.
A value of 1 will indicate to the RifPlugin the mesh should be rendered as a wireframe.
A value of 2 indicates that both normal and wireframe rendering are required.
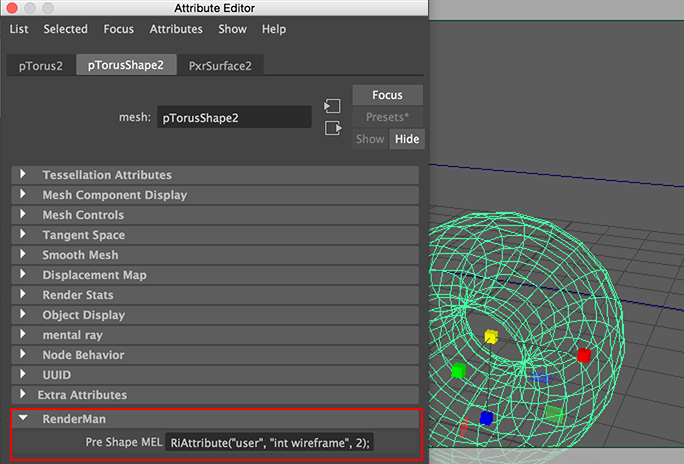
Figure 5
Finally, render the scene.
Correcting Rendering Artifacts
Rendering defects can occur when using thin curves. One setting that can be used to correct rendering artifacts, figure 6, is to set "Micropolygon Length" to a value smaller than the default of 1.0 - say 0.2.
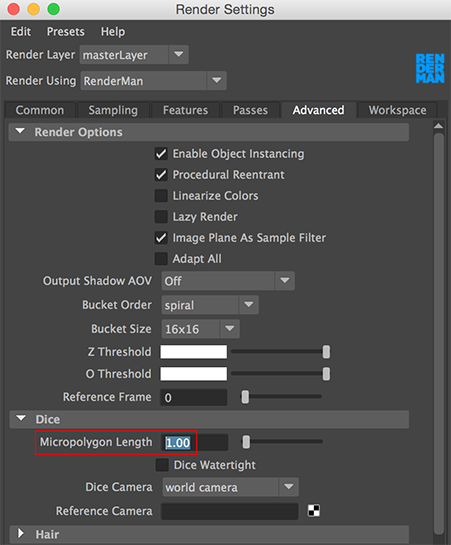
Figure 6
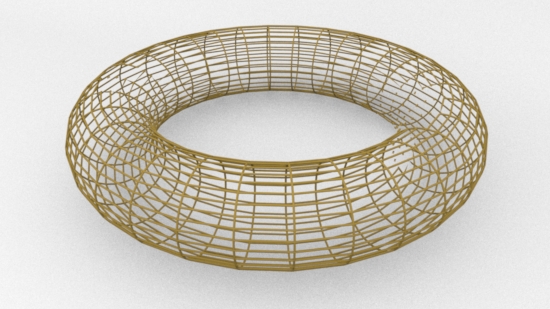
Figure 7 Rollover
Defects at "micropolygon length" 1
Corrected by setting "micropolygon length" to 0.2