Mtor
Slim Ribbox Scripting 3


return to main index

Related Links
   Slim Ribbox Scripting 1
   Slim Ribbox Scripting 2
   Slim Ribbox Scripting 4
   Slim Ribbox Scripting 5
   Slim Ribbox Scripting 6


Introduction

Slim Ribbox Scripting I & Scripting II provided introductory and intermediate examples of using TCL expressions in a slim ribbox. This page provide several ribbox (TCL) scripts that cause a polygon mesh and a nurbs curve to be replaced by a series of objects. In the first example, the MEL commands clientcmd and pointPosition are used to querry the vertex data of a polygonal mesh. The xyz coordinates of each vertex of the mesh are used to position (arbitary) objects across the 
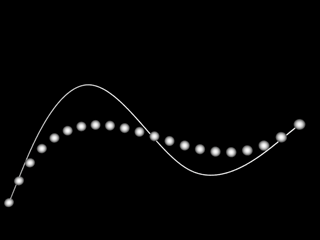
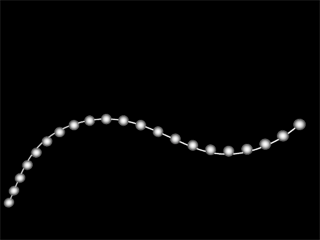
mesh. The second example uses pointOnCurve to replace a curve with a series of objects.

Ordinarily, when replacing a proxy object with a single archive rib ie. pre-baked rib, the (RenderMan not Maya) visibility of the proxy is controlled by the menu item found in RenderMan Globals ie. mtor invis. Unfortunately, with release of RAT 6.5 assigning mtor invis to a proxy object causes mtor to totally ignore the object! Both ribbox scripts resort to writing Opacity 0 0 0 into the rib stream. If the shader (appearance) attached to the proxy recognizes Os (ie. surface opacity) the proxy will become invisible. Hopefully, a later version of RAT will restore the "traditional" behavior of mtor invis.


Polymesh Replacement

Figure 1 shows a character model that was kindly made available to me by Kelly Eisert. Figure 2 shows the effect the ribbox, shown in ribbox listing 1, has had on the rendering of the model.

[
set tok [split $OBJPATH |]
set tnode [lindex $tok end-1]
set n [clientcmd "polyEvaluate -v $tnode"]
set n [lindex $n 0]
set out ""
for {set i 0} {$i < $n} {incr i} {
    set str $tnode
    append str ".vtx\[$i\]"
    set pnt [clientcmd "pointPosition -world $str"]
    set    rib "TransformBegin\n"
    append rib "Transform \[1 0 0 0 0 1 0 0 0 0 \
                            1 0 0 0 0 1\]\n"
    append rib "\tTranslate $pnt\n"
    append rib "\tReadArchive \"G:/archives/cube.rib\"\n"
    append rib "TransformEnd\n"
    append out $rib
    }
append out "Opacity 0 0 0\n"
return $out
]


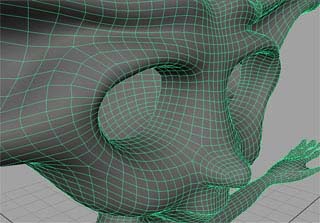
figure 1 - original model


figure 2 - polygon mesh replaced by cubes


Lines 2 and 3 obtain the name of the transformation node of the model. For example, slim's pre-defined variable $OBJPATH may contain the following text,

|ZBrushPolyMesh3D|ZBrushPolyMesh3DShape

Note the Maya path separator is the pipe (|) character. The TCL procedure split tokenizes its input string and, in the case of the example text, returns the following list,

{} ZBrushPolyMesh3D ZBrushPolyMesh3DShape

Line 3 sets the variable tnode to item 1 of the list ie. ZBrushPolyMesh3D. Having obtained the name of the transform node, the MEL command polyEvaluate -v is used to querry the number of vertices in the poly mesh. Since this MEL command returns an array, line 5 accesses the required element of the array. Lines 7 to 16 uses a "for" loop to querry the xyz of each vertex of the poly mesh. Each iteration of the loop, in effect, writes text similiar to that shown below into the RIB stream,

    TransformBegin
        Translate 0.139515 -2.34644 1.20277 
        ReadArchive "G:/archives/cube.rib"
    TransformEnd

In this example, ReadArchive is referencing a pre-baked rib of a cube. However, any geometry could be used and the placement of the geometry can, of course, be modified by other transformation and/or attribute commands. For example, figure 3, shows the effect of assigning opacity to each pre-baked rib according the vertex "number".

Ribbox listings 1,2 & 3 use the RIB command Transform [..16 values..] to temporarily reset their current coordinate systems to the world coordinate system.

Ribbox listing 2 demonstrates the use of the MEL command polyNormalPerVertex to obtain information about the averaged normal at a vertex. The command returns several copies of the normal, therefore, the TCL procedure lrange is used to retrieve only the first three values.


figure 3


[
source "PATH_TO_AIMY_SCRIPT"
set tok [split $OBJPATH |]
set tnode [lindex $tok end-1]
set n [clientcmd "polyEvaluate -v $tnode"]
set n [lindex $n 0]
set out ""
for {set i 0} {$i < $n} {incr i} {
    set str $tnode
    append str ".vtx\[$i\]"
    set pnt  [clientcmd "pointPosition -world $str"]
    set norm [clientcmd "polyNormalPerVertex -q -xyz $str"];
    set norm [lrange $norm 0 2]
    set ang  [aimY $norm]
    set    rib "TransformBegin\n"
    append rib "\tTranslate $pnt\n"
    append rib "\tRotate [lindex $ang 1] 0 0 1\n"
    append rib "\tRotate [lindex $ang 0] 1 0 0\n"
    append rib "\tRotate -90 1 0 0\n"
    append rib "\tCylinder 0.01 0 1 360\n"
    append rib "TransformEnd\n"
    append out $rib
    }
append out "Opacity 0 0 0\n"
return $out
]
Curve Replacement

At first sight it would seem the task of writing a ribbox (TCL) script to place objects along a curve would be easier than the previous problem of replacing a polymesh with pre-baked objects. Generating equally spaced (xyz) locations with the MEL command pointOnCurve is, indeed, straightforward. The tricky part is figuring out how to place objects, say pre-baked ribs, at those locations in such a way that they "follow" the curve when it changes shape or when it is moved.

In the previous example, where MEL command pointPosition could use either the -local or -world flag the pointOnCurve command does not have a similiear ability to switch between coordinate systems.The xyz data it returns is in the world coordinate system. Therefore, line 9 ensures our transformations are applied relative to the world coodinate system.

RIB listing 1 shows a typical series of RIB statements produced by mtor.


[
set tok [split $OBJPATH |]
set tnode [lindex $tok 1]
set rib ""
for {set n 0.0} {$n <= 1.0} {set n [expr $n + 0.1]} {  
    set pnt [clientcmd "pointOnCurve -p -top 1 \
              -pr $n $tnode"]
    append rib "TransformBegin\n"
    append rib "Transform \[1 0 0 0 0 1 0 0 0 0 \
                            1 0 0 0 0 1\]\n"
    append rib "Translate $pnt\n"
    append rib "Sphere 0.1 -0.1 0.1 360\n"
    append rib "TransformEnd\n"
    }
append rib "Opacity 0 0 0\n"
return $rib
]

ribbox listing 3


To ensure the xyz positions returned by the pointOnCurve are equally spaced the following MEL command must be applied to the curve.

    rebuildCurve -rt 0;

This command also ensures a better "fit" (figure 5) of the replacement objects and the curve. Incidently, the curve to which the ribbox is attached must also be assigned mtor->Curve Rendering->Attach.


figure 5 - before rebuildCurve


AttributeBegin 
    ResourceBegin 
    Attribute "identifier" "name" ["|curve1|curveShape1"]
    ConcatTransform [1 0 0 0 0 1 0 0 0 0 1 0 0 0.816038 0 1]
    ShadingInterpolation "smooth"
    Basis "b-spline" 1 "b-spline" 1

    #slim ribbox RIBBox_0 
    TransformBegin
        Transform [1 0 0 0 0 1 0 0 0 0 1 0 0 0 0 1]
        Translate 0 -0.183962 0 
        Sphere 0.05 -0.05 0.05 360
    TransformEnd
    Curves "cubic" [8] "nonperiodic" 
    "P" [0 -1 0 0 -1 0 0 -1 0 1 1 0
    2 -1 0 3 0 0 3 0 0 3 0 0] "constantwidth" [0.01]
    ResourceEnd 
AttributeEnd

RIB listing 1


figure 4


© 2002-6 Malcolm Kesson. All rights reserved.