Introduction
This tutorial presents a summary of the steps needed when to render caustic effects, such as those shown below, using RMS 18.

Figure 1

Figure 2
Step 1 - Add Caustic Controls
To each RMSGPSurface or RMSMatte material assigned to the surfaces that will play a role in the generation of caustics add "Caustic controls".

Figure 3
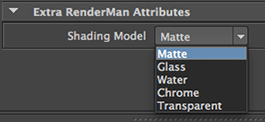
Set the "Shading Model" for the surface that will receive the photons and, hence displace the caustic pattern, to "Matte". Other surfaces that will interact with the photons should have their shading model set appropriately. For example, the RMSGPSurface assigned to the finger ring in figure 1 had its shading model set to "Chrome".

Figure 4
Step 2 - Controlling the Caustics
Because RMS18 GeoAreaLights are unable to cast photons they cannot be used to
illuminate a scene, or parts of a scene, that require caustics. However,
standard Maya lights can be used. It may seem strange that standard Maya
lights can be used for physically plausible shading but the "renderman_for_maya"
plugin converts them to older style RMSAreaLights that are able
to cast photons.
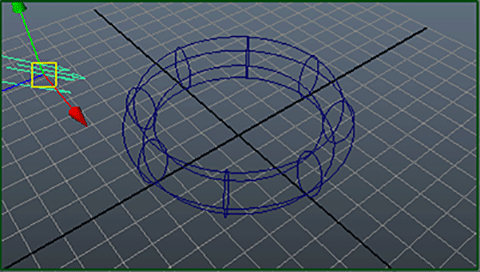
The scene shown above, figure 2, uses a Maya directional light. In the attribute
editor for the light it was assigned caustic attributes,
Attributes->RenderMan->Add Caustic Attrs

Figure 5
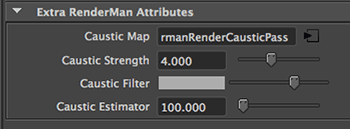
The caustic controls panel, figure 5, enables the brightness, color and definition of the caustics to be controlled. If the caustic pattern does not appear replace the directional light with a Maya spot light.
Step 3 - Controlling Photons
Click the RenderMan Controls button.

Figure 6
Change the View menu to "Pass Settings Tree" and select "rmanRenderCausticsPass".

Figure 7
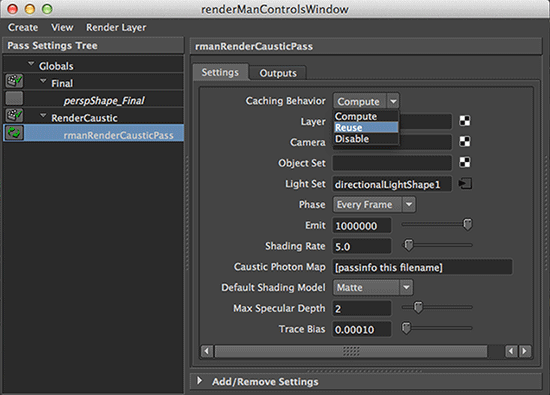
The "Camera" field in the "Settings" panel indicates
the items in the panel will control an additional render pass that will take place before
the final (beauty) pass. The purpose of this extra step is to produce photon data,
stored in a "caustic photon map",
that will be used by the materials in the final render to generate the caustic patterns.
There are two settings that will need to be changed.
The "Emit" field may need to be changed to, say, 1 to 10 million.
Changing the "Caching Behavior" from "Compute" to "Reuse"
it will enable a previously generated photon map to be read for improved
rendering speed.