Assigning the Shader
1 Add a new light to the Maya scene then choose "Add Custom Light Shader" - figure 1.
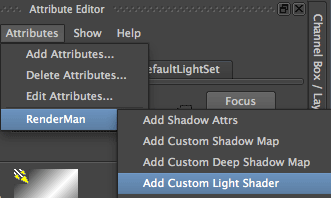
Figure 1
In the "Extra RenderMan Attributes" panel select the checker box. The attribute editor for a RenderMan shader will open.

Figure 2
Standard Shadow Map
2.1 Browse for your shader. Note the parameter named "shadowname" has been automatically assigned a TCL expression.
[passinfo rmanShadowPass filename -output 0 -validate 1]
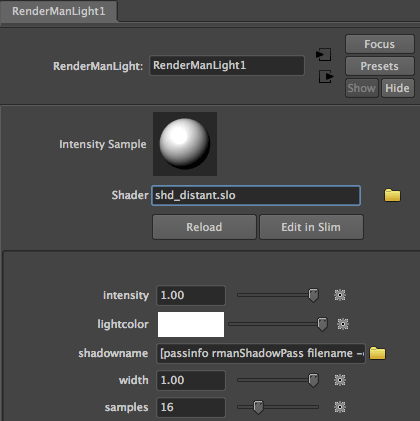
Figure 3
For a shadow pass to be rendered the "Use Depth Map Shadows" checkbox must be selected - figure 4.

Figure 4
Deep Shadow Map
2.2 Make sure the "Use Depth Map Shadows" checkbox is not selected. Go to the attribute editor of the custom light shader and right-mouse click in the text field of the shadow map (figure 5) and choose "Create DeepShadow".
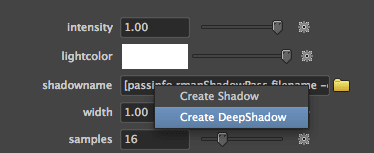
Figure 5
To double check if the appropriate shadow pass will be rendered open the "RenderMan Controls..." window - it is available from the main RenderMan menu. Select the "Pass Settings Tree" option from the "View" menu - figure 6.
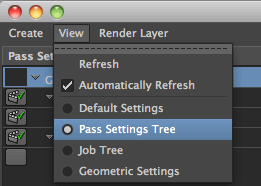
Figure 6
The "DeepShadow" pass should be listed - figure 7. It may be necessary to choose "Refresh" from the "View" menu in order to update the display of the "pass settings tree".
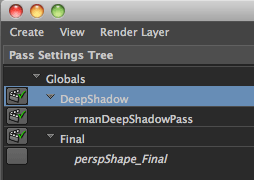
Figure 7
2.3 Select "Add Shadow Attrs" from the Attributes->RenderMan menu - figure 8.
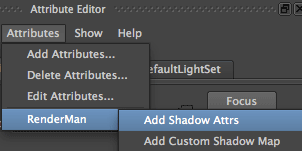
Figure 8
Once again check the "Pass Settings Tree" to ensure the deep shadow pass will be rendered.