Figure 1
Cutter
|
Introduction
This tutorial explains how Cutter can be used to write scripts, called Slim templates, that
implement custom nodes for Pixar's Slim shading editor. Slim is one of
a suite of applications that collectively form RenderMan for Maya (RfM).
Like many components of the RMS graphics system Slim templates are scripted in the
Tool Command Language (TCL).
The RMS online documentation provides very detailed information about Slim scripting. They are
the primary source of information and guidance for those wishing to understand
the inner workings of Slim.
Clarification about the use of the word "template"Pixar's Slim templates are documents that implement nodes used by the Slim shading editor. Somewhat confusingly, Cutter also uses the term "template". However, Cutter templates are documents that provide users with snippets of sample code to help them get started in a variety of languages such as python, tcl, rib etc. |
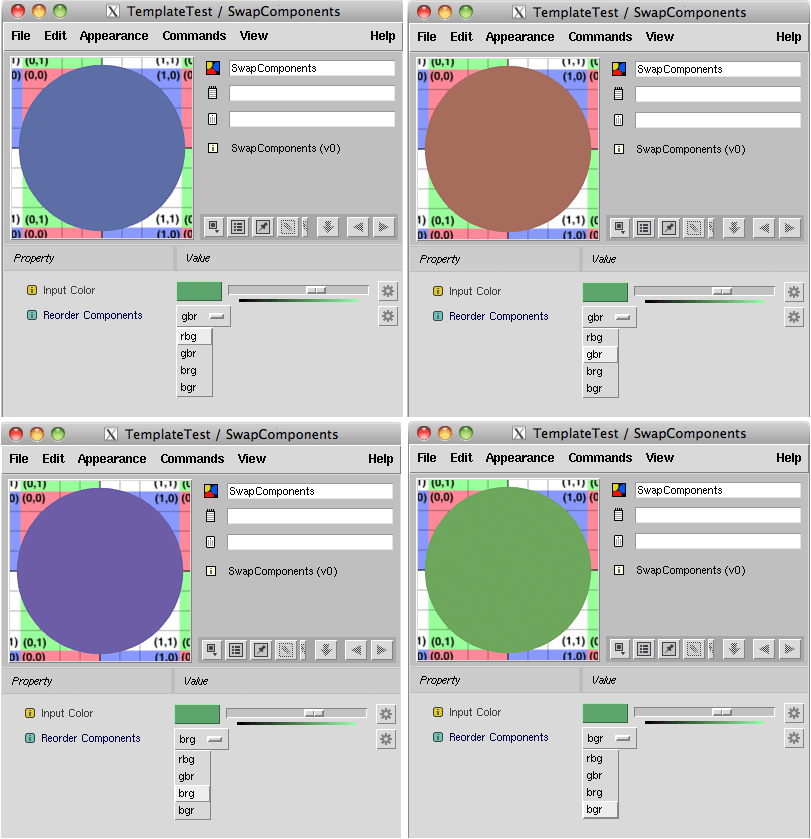
ScriptingThe following step-by-step tutorial shows how a simple and, it must be said, quite bizarre node can be created using Cutter. The following screen shots show how the node can be used to reorder the "rgb" components of an input color as "rbg", "gbr", "brg" and "bgr". |
|
|
Step 1 - creating an empty Slim doc
Choose the
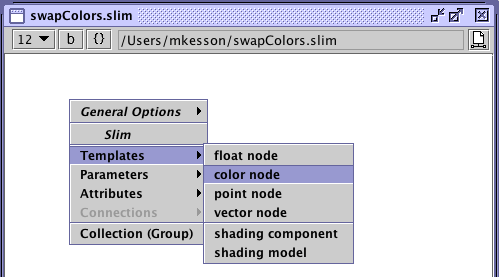
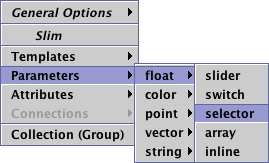
Save the document as Step 2 - adding bootstrap Slim codeA right mouse button click will raise a popup menu. Choose Templates->color node - figure 2.
The document will be populated with code, see below, that will act as the starting point for the development of a color node. |
|
Bootstrap Code (SwapComponents.slim)
|
Step 3 - changing the default names
# menuInfo fundza,SwapComponents#0 color node SwapComponents /Color node
template color SwapComponents {
void cutrSwapComponents ( Slim templates are written in the TCL scripting language. White space is very important in TCL. Make sure the space before each "{" curly bracket is never removed - doing so will "break" the node!! |
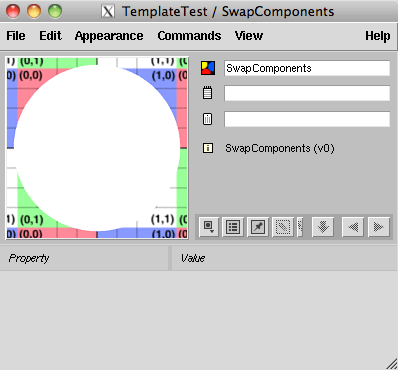
Step 4 - testing the templateBefore any significant Slim (ie. TCL) scripting is done, we will next see how a Slim document can be sourced. Use the Slim button on the RenderMan shelf to launch Slim - figure 3.
commandPort -n ":2222"
|
Step 5 - building the interface
    parameter color c {
        label "Input Color"
        description "No description."
        default {0.37 0.65 0.43}
        detail varying
        }
    void cutrSwapComponents (
        // parameter vars goes here...
        color c;
        output color result;
        )
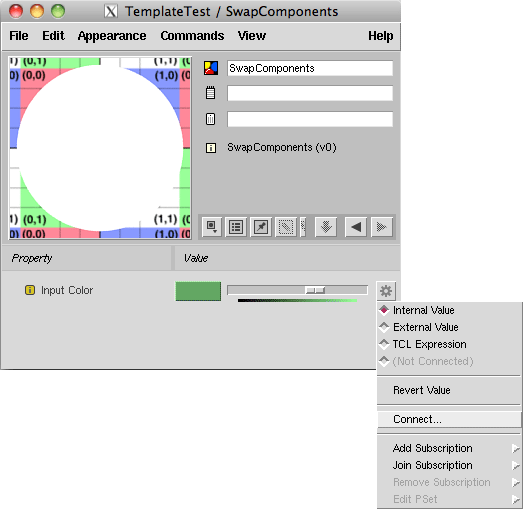
Use the keyboard shortcut to send the script to Maya. Because the parameter was defined as "varying" it will be able to connect to other nodes - figure 6.
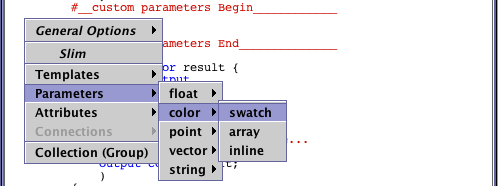
Edit the float parameter's name, label, range and default value as shown below. #__custom parameters Begin____________
parameter color c {
label "Input Color"
description "No description."
default {0.37 0.65 0.43}
detail varying
}
parameter float comps {
label "Reorder Components"
description "No description."
subtype selector
range {rbg 0 gbr 1 brg 2 bgr 3}
default 0
provider variable
}
#__custom parameters End______________
    void cutrSwapColors (
        // parameter vars goes here...
        color c;
        float comps;
        output color result;
        )
|
Step 6 - implementing the RSL codeEdit the body of the RSLFunction as shown below. void cutrSwapComponents (
color c;
float comps;
output color result;
)
{
if(comps == 0)
result = color(c[0],c[2],c[1]);
else if(comps == 1)
result = color(c[1],c[2],c[0]);
else if(comps == 2)
result = color(c[2],c[0],c[1]);
else
result = color(c[2],c[1],c[0]);
}
Save the file, send it again to Slim. If you wish to make it automatically available for use with every session of Slim follow the instructions in the tutorial RMS: Setup for Mel, Rman, Slim & the Image Tool. The complete code for the SwapComponents node is given below. |
|
SwapComponents.slim
|
© 2002- Malcolm Kesson. All rights reserved.