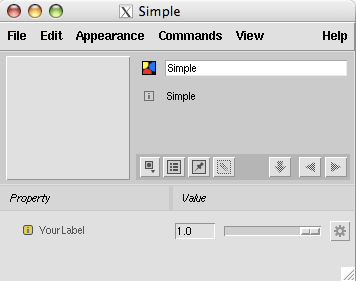
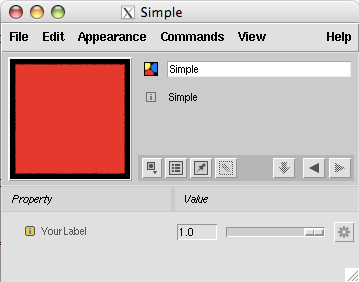
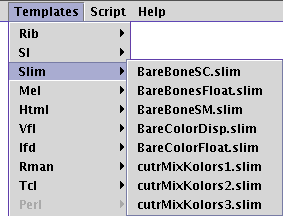
Slim
Introduction to Templates


return to main index


Introduction

Slim nodes, such as ColorCells shown below, are defined by scripts called Slim templates. The scripts are located in,
    RenderMan_Studio-X.X.X-Maya2008/lib/slim
Slim templates are written in TCL (Tool Control Language). They can be identified by their .slim file extension.


Figure 1


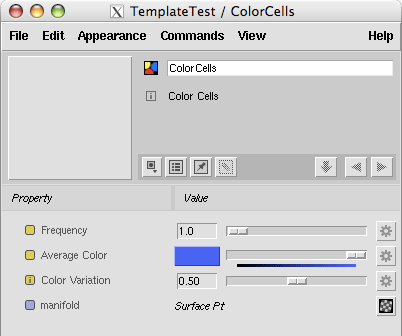
Unfortunately, another type of Slim document, known as an appearance slim, also uses the same file extension. Therefore, the only way to identify a slim template is to open it with a text editor. Superficially, both types of Slim documents are similiar. The main difference between them is that a Slim appearance file accompanies a compiled shader. It define the details of the GUI that will be presented to an artist when using a shader in Maya's HyperShade editor.

In addition to defining a GUI, a template also contains code that will generate RenderMan Shading Language code. For an overview of the operational difference between templates and appearances refer to Slim: Shaders, Appearances and Templates.


Structure of a Template

As shown below, a template is made up of two sections. The first section consists of sequence of blocks; in the example they are labelled previewinfo and parameter. The second section, indicated by the red line, containes an RLS block. Slim templates have a nested "block" structure. There can be any number of input parameter blocks but only a single output parameter block. The input parameter blocks defines the GUI the node will "present" to an artist. The RSL block defines how the node will calculate its output value. The red horizontal line in listing 1 is not part of a template. It is merely a "decoration" intended to demarcate the two sections of a template.

Outside the RSL block comments begin with a hash (#) symbol. Inside the RSL block standard RenderMan Shading Language comments must be used ie. "//", "/*" and "*/"..


Listing 1 (Simple.slim)


slim 1 extensions cutter {
extensions fundza cutr {
template color Simple {
description "Node info goes here"
previewinfo {
    shadingrate 1
    objectsize 1
    objectshape Plane
    frame 1
    }


parameter float input_1 {
    description "Info goes here"
    label "YourLabel"
    detail varying
    default 1
    range {0 1 0.1}
    }


parameter color result {
    access output
    display hidden
    }


RSLFunction {
    void cutrSimple (
        float input_1;
        output color result;
        )
    {
    result = color "hsv" (input_1,1,1);
    }
}

}
}
}


The Simple.slim template, shown above, implements a color node, hence the datatype color is found in the following contexts,

    template color Simple {
    parameter color result {
    output color result;

The node created by Simple.slim outputs a color derived from the input value setting a hue. Within the RSLFunction, the name of the function (cutrSimple) is prefaced with a four character prefix that is declared at the head of the template. The prefix (cutr) is one of three strings (cutter, fundza, cutr) that provide a signature for the template. Pixar's factory nodes are "signed" as follows.

    slim 1 extensions pixardb {
        extensions pixar pxsl {

The reader can use their own signature strings.


Executing the Template

A template can be loaded by Slim in several ways. The easiest method is to edit a template with Cutter and then follow these steps.

  1. Copy and paste the code for Simple.slim into a blank document in Cutter.
  2. Save the document as "Simple.slim" - the location is not important.
  3. Enter this Mel command in Maya, commandPort -n ":2222"
  4. Ensure the RenderMan for Maya plugin is loaded and that Slim is running.
  5. In Cutter press control + e or alt + e to execute the script.

Cutter will will tell Maya, via port 2222, to source a Mel script that will instruct it to load the template. The Mel script can be found in,
    Cutter_Help/slim_headers/sendToMaya/RMS/sendTemplateToMaya.mel

The editor for Simple will open - figure 2.


Figure 2 - Before Clicking the Preview Panel


Figure 3 - After Clicking the Preview Panel


When an artist clicks the preview panel, Slim uses the RSL code within the RSLFunction block to generate and compile an external RSL file. A fraction of a second later Slim uses the compiled shader to render the shape specified in the previewinfo block of the template - figure 3. Other shapes can be specified, for example, in Cutter change,
    objectshape Plane
to
    objectshape Torus
then, execute the script again in Cutter and click the preview panel. Figures 4 to 9 show the other shapes that can be used by the previewinfo block.


Figure 4 - Torus


Figure 5 - Cylinder


Figure 6 - Plane


Figure 7 - Sphere


Figure 8 - Teapot


Figure 9 - Cube


Barebones Templates

Cutter comes with a number of examples of templates. They are available from Cutter's Templates menu - figure 10.


Figure 10

Because templates are written in TCL there must be at least one white space character before each open curly brace.


© 2002- Malcolm Kesson. All rights reserved.