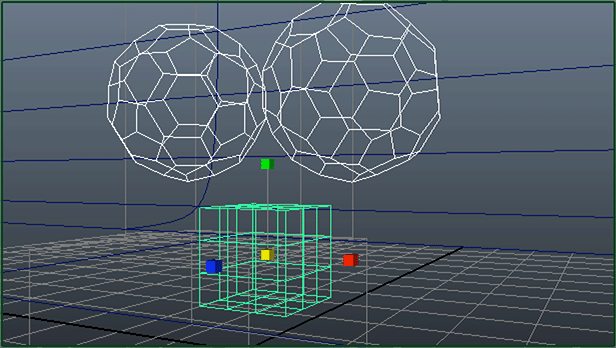
Figure 1 Basic Maya Scene
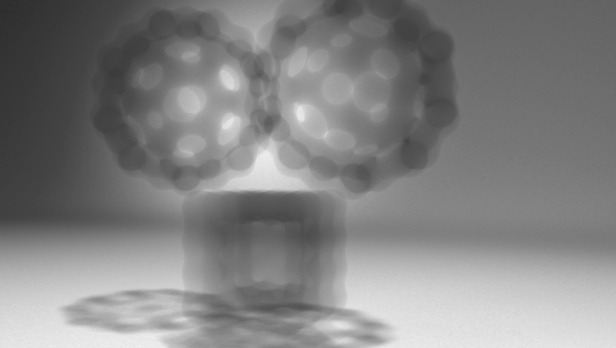
Figure 2 - After rif'ing with Mesh2Blobby.so and Blobby2Volume.so
RifPlugin
|
IntroductionThe plugins presented in the Mesh2Blobby and Blobby2Volume tutorials are used in this tutorial to show how several rifplugins can alter the appearance of the geometry in a scene. The Maya scene shown below consists of two polymesh Soccer Balls, one of which has been assigned the RenderMan "Subdiv Scheme", and a sub divided poly cube. |
|
|
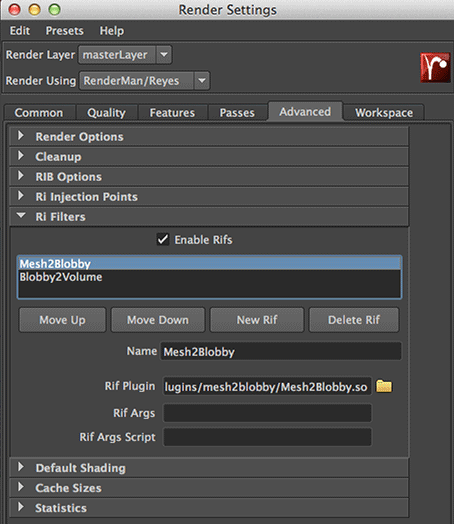
Using RfMAdd the rifs to the list maintained by the Ri Filters panel. The order in which the rifs are specified determines the order in which they will be applied.
|
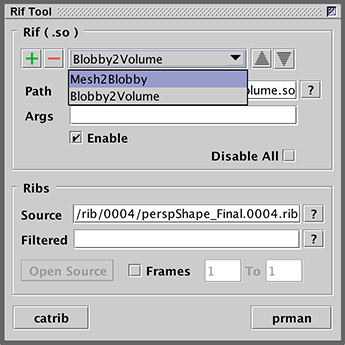
Using Cutter
To test multiple rifs using Cutter's Rif Tool, first generate a beauty pass rib using
RfM or Houdini. However, when generating a rib with RfM make sure the,
|
© 2002- Malcolm Kesson. All rights reserved.