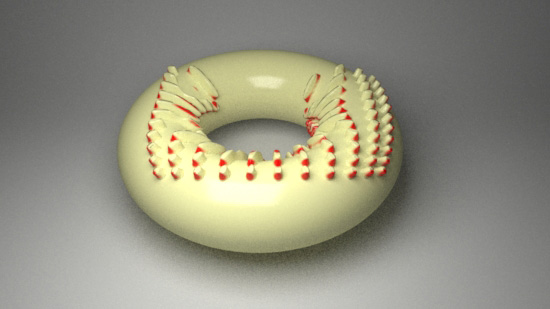
OSL
Vertices To Color


return to main index

Related Tutorial:
    OSL: Wyvill Lines

Download:
    scripts.zip


Introduction

This tutorial presents a shader called vertsToColor that creates a pattern controlled by the vertices of one or more polygonal objects. Figure one illustrates the effect of using the shader to control diffuse color and displacement.


Figure 1
Rollover


The vertsToColor shader (listing 1) applied to the nurbs torus in figure 2 reads data generated by a mel script (verticesToRiAttr.mel listing 2) that is "assigned" to the shape node of the torus. The script is automatically executed when the scene is rendered. Any polygonal object or objects, such as pPlane1, belonging to "group1" have their vertices written as two "user" RenderMan attributes. For example,

Attribute "user" "int num_verts" [121]
Attribute "user" "point[1000] vertices" [-16.64263019 13.10327724 16.1911456
                                         followed by 120 xyz values and 
                                         additional "padding" values to define 
                                         the array of 1000 elements] 

The first attribute, nun_verts, tells the shader how many vertices in the second array attribute, vertices, are valid. Because the array of points MUST be of a fixed size, in practice, most of data specified by the second attribute consists of "padding" values.
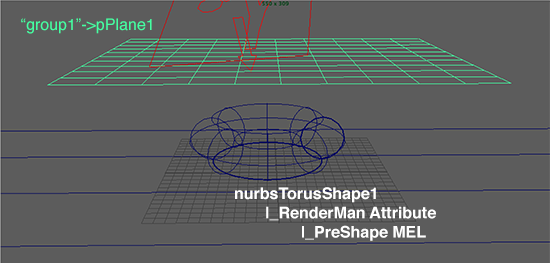


Figure 2


The mel script, verticesToRiAttr.mel, acts as a so-called "PreShape MEL". Some preliminary information about such scripts can be found in the following tutorial,
    RfM: Introduction to RiMel Scripting

The rationale underpinning the OSL/MEL combo is very similar to the technique outlined in the tutorial,
    OSL: Wyvill Lines


Workflow

Step 1 - Installing the Scripts

It is assumed the reader has followed the recommendations on customizing RenderMan for Maya presented in the tutorial, "RfM: Customizing". Copy the OSL shader source code to your RfM_osl directory.

    maya/projects/RfM_osl/src/vertsToColor.osl

Open the .osl and compile it in Cutter. Copy the mel script to your to your RfM_mel or scripts directory.

    maya/projects/RfM_mel/verticesToRiAttr.mel

Step 2 - Create the Object(s) whose Vertices will Effect the Target Geometry

Create, say, a polyPlane and group it (group1). Scale and translate the polyPlane so that is above the modeling grid.


Step 3 - Assigning the Shading Network to the Target Geometry

Create, say, a sphere (polygon or nurbs). Scale it and use the Modify menu to "Freeze Transforms". Create an instance of PxrOSL node and browse for the previously compiled vertsToColor.oso. Assign an instance of PxrSurface to the sphere and connect the PxrOSL.resultRGB output to the PxrSurface.diffuseColor input.


Step 4 - Assigning the PreShape Mel Procedure to the Target Geometry

On the Shape Tab of the sphere go to the Attributes->RenderMan->Manage Attributes... menu item. From the "Add/Remove Attributes" Window add the item named "PreShape MEL". An extra "RenderMan" panel will be added to the sphere's Shape Tab panel. Enter this text in the textfield labeled "Pre Shape MEL",
    verticesToRiAttr("group1",1000);


Step 5 - Add Lights and Render the Scene

If the target object renders uniformly purple it is an indication the mel script was not found. Save the scene, restart Maya and try again.


© 2002- Malcolm Kesson. All rights reserved.