Overview
This page demonstrates how to use Cutter to add and use a float parameter and a enum parameter to a shader.
Step 1
Go to the Templates->Arnold Shaders->mkSampleShader.cpp menu item.
Save the document, for example, mkParamDemo.cpp in your
maya/projects/Arnold_Shaders/src_c++/
directory.
Go to line 32 and change,
node->name = "NAME_OF_YOUR_SHADER";
to
node->name = "mkParamDemo";
Make sure the node name matches exactly the name of the document (without the .cpp extension).
Step 2 - Adding a Float Parameter
At line 19 use the right mouse button and select,
Declare Shader Parameters->AiParameterFlt
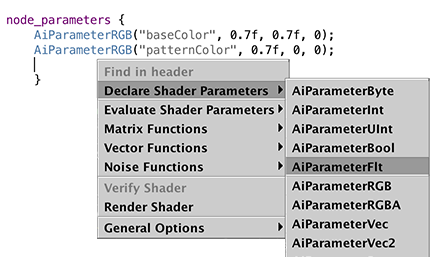
Figure 1
Edit line 19 so that the new parameter has a name (no spaces are allowed in the name) and a default value. For example,
AiParameterFlt("patternOffset", 0.5);
Add additional named constant to the paramIndex enum (line 13). For example,
namespace {
    enum paramIndex { k_base_color, k_pat_color, k_pat_offset };
    };
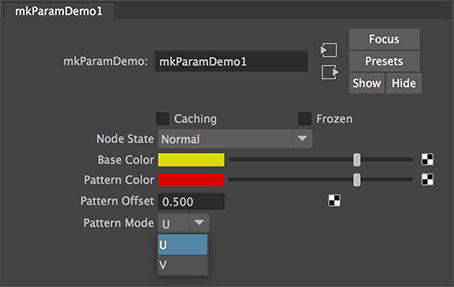
Step 3 - Adding a Enumerated Parameter
When used in Maya an enumerated parameter will be displayed as a dropdown menu.
At line 20 use the right mouse button and select,
Declare Shader Parameters->AiParameterEnum
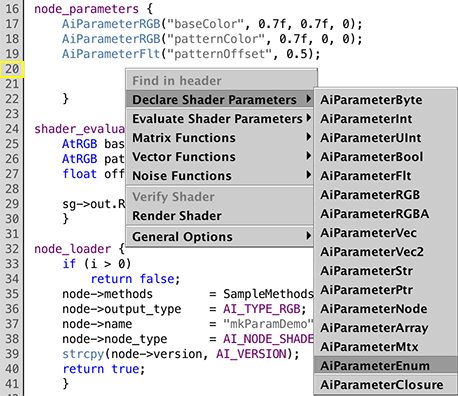
Figure 2
Edit line 20 so that the new parameter has a name, a default index and the name of the array that will list the labels for the dropdown. For example,
AiParameterEnum("patternMode", 0, uv_mode);
Add additional named constant to the paramIndex enum (line 13). For example,
namespace {
    enum paramIndex { k_base_color, k_pat_color, k_pat_offset, k_pat_mode };
    };
At line 15 insert the following declaration of an array of strings that will be used as labels for the dropdown menu.
static const char* uv_mode[] = { "U", "V", NULL };
Step 3 - Using the Float and Enum Parameters
At line 27 use the right mouse button and select,
Evaluate Shader Parameters->AiShaderEvalParamFlt
Edit the line as follows.
float offset = AiShaderEvalParamFlt(k_pat_offset);
At line 28 again use the pupup menu and select,
Evaluate Shader Parameters->AiShaderEvalParamEnum
Edit the line as follows.
int mode = AiShaderEvalParamEnum(k_pat_mode);
Replace this code,
sg->out.RGB() = (sg->u >= 0.5) ? pat : base;
with the following lines of code.
    if(mode == 0)
        sg->out.RGB() = (sg->u >= offset) ? pat : base;
    else
        sg->out.RGB() = (sg->v >= offset) ? pat : base;
Finally, recompile and build the shader using the keyboard shortcuts Alt+e, Control+e or Apple+e.