Cutter
Pixar's RenderManProServer


return to main index


Step 1 - Preferences System Paths


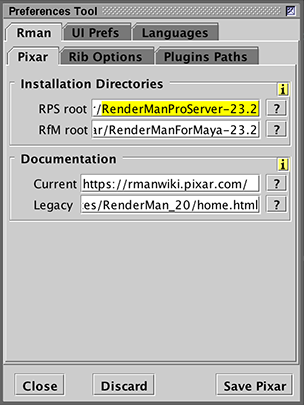
Go to,

    Edit->Show Preferences->Rman->Pixar


Figure 1


The paths to the installation directories for RenderManProServer and RenderManForMaya must be specified. The browse button (marked with a question mark) will enable you to search for the appropriate paths. For example, on Windows the paths might be:

   C:/Program Files/Pixar/RenderManProServer-23.2
   C:/Program Files/Pixar/RenderManForMaya-23.2


Click the "Save Pixar" button to save the edits.


Step 2 - Preferences Rib Options


Go to,

    Edit->Show Preferences->Rman->Rib Options


Figure 2


The paths to the "textures", "archives" and "frames" directories are ONLY relevant if the reader intends to experiment with writing and rendering RIB files. For example, see the tutorial,
    RIS: Introduction to Shading


Go to,

    Edit->Show Preferences->Languages->Osl


Figure 3


On Windows the paths to the Pixar "source" and "shaders" directories might be,
   C:/Users/jdoe/Documents/maya/rfm_scripts/nodes/src_osl
   C:/Users/jdoe/Documents/maya/rfm_scripts/nodes


Step 3 - Rendering Check


Open the Tools->Show RenderMan Tool window. From it's Docs menu choose Docs->New Beauty Pass Rib. Save the Rib document.


Figure 4


Click "prman" button at the bottom of the Rman Tool palette. If everything is working properly the Process Monitor will report an image has rendered successfully. If a rendered image does not appear it will be caused by the paths to RPS and RfM (step 1) have not been set correctly. It may be necessary to restart Cutter.


© 2002- Malcolm Kesson. All rights reserved.