Introduction
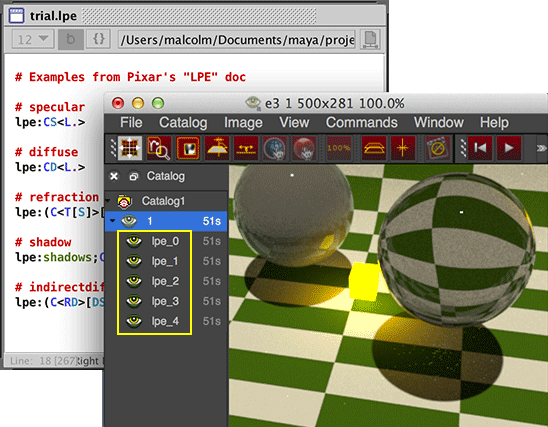
The RifPlugin presented here is intended to help artists experiment with LPE's. When using the RifPlugin there is no need to use the RenderMan Controls window to assign a custom LPE. Instead, LPEs can be saved as a text document in Maya's current project directory. For example, a text file named "trial.lpe" might contain the following text.
lpe:C<RD[^'floor']><L.> # not_floor
lpe:C<RD['floor']><L.>  # floor
When rendering a scene that uses the LPE_Rif plugin adds the appropriate
DisplayChannel and secondary Display statements to
the output rib stream as a result of reading the lpes contained in "trial.lpe".
Any other AOVs that have been assigned via the RenderMan Controls window or the
Render Setting "Passes" tab are not effected by the rif.
AOV outputs can be named by providing a comment on the same line as the lpe. For example, this lpe
would be named "diffuse_foo_light" in the "it" window or as a channel in an openexr file.
lpe:C<RD><L.'foo'> # diffuse_foo_light

Figure 1
Another advantage of using the rif is that only is it easier to experiment with LPEs in order to learn about the tokens they use but shot-specific custom LPEs do not have to be added to the rendermn.ini file.
Step 1 - get the Rif plugin
Pre-built versions of the plugin are available for downloading from the link at the top of this
page. Alternatively, save the source code in the,
Maya/projects/RfM_rif
directory. Open the file in Cutter
and press control + e, or alt + e, or Apple + e to build the plugin.
Step 2 - create a LPE text file
Save the following text as trial.lpe in the Maya project directory that you intend
to use for your LPE experiments, say,
Maya/projects/LPE
Listing 1 (trial.lpe)
# Examples from Pixar's "LPE" doc

# specular
lpe:CS<L.>

# diffuse
lpe:CD<L.>
|
Step 3 - assign the plugin
Go to the Render Settings Advanced tab and assign the plugin and the trial.lpe file.

Figure 1
Step 4 - edit 'r' edit 'r' etc...
Experimentation with one or more LPE's can proceed quickly by editing the trial.lpe document in Cutter (or any other text editor) and pressing 'r' in the "it" window to re-render. There is no need to keep Maya as a "front" window.
