Python & RfM
Repurposing MoCap Data


return to main index

Download: mocap


Introduction

The tutorial, Python: Parsing MoCap Data, presented two python classes (MoCapMarker and MoCapDB) that can read and store mocap data. This tutorial presents a super class of MoCapDB, called MoCapRMan, that uses the mocap coordinate data read by the base class to generate rib archives containing RenderMan RiPoint, RiCurves and RiBlobby geometry. Examples of the geometry created by instances of the MoCapRMan class are shown below. The data files used for the illustrations was obtained from the website of the Advanced Computing Center for the Arts and Design, Ohio State University,
      https://accad.osu.edu/research/motion-lab/system-data


Figure 1
343 fields (frames) - one RiPoint per mocap marker.


Figure 2
41 RiCurves - one curve per marker each with 343 cvs.
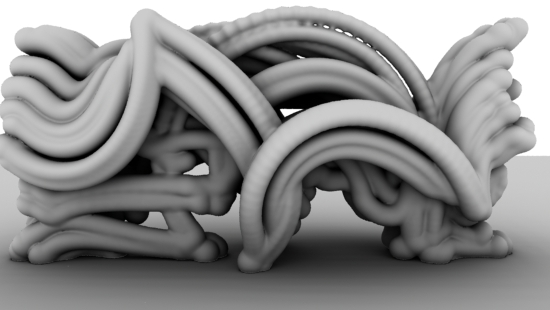
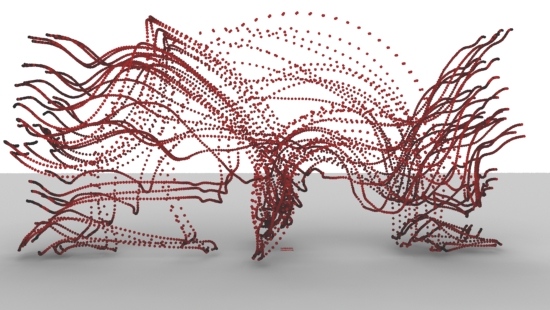


Figure 3
One RiBlobby - one blob per marker per frame (14063 blobs).


When used with an approriate interface with Maya the primitives generated by
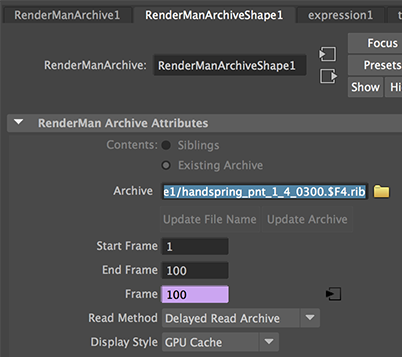
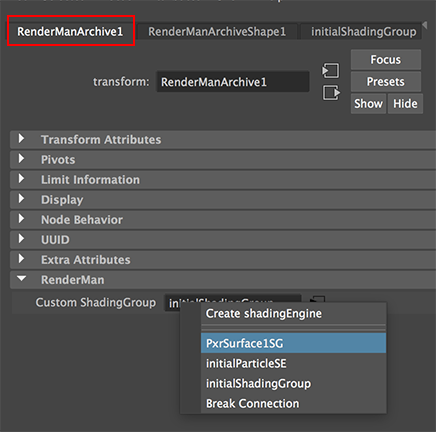
 MoCapRMan can easily be animated - figure 4. The .rman and .mel scripts that create a GUI for use with MoCapRMan is given in the next section.


Figure 4
Animation with a 'trail' of 15 frames.


Figure 5
Animation with a 'trail' of 160 frames.


MoCapRMan, Maya & RfM

The easiest way to use mocap python scripts with Maya is to create an artist-friendly user interface. This section of the tutorial demonstrates how an interface for use by Pixar's RenderMan for Maya (RfM) can be added to Maya - figure 6.


Figure 6


Unzip mocap.zip and save the following three scripts in these directories,

    maya/projects/RfM_python/
                            |_ mocap_rman.py
    maya/scripts/
                |_ mocap_db.py
                |_ maya_proj_utils.py

The interface for Maya is implemented by following three scripts. They should be saved in the RfM_mel directory. For example,

    maya/projects/RfM_mel/
                         |_ mocap.rman	
                         |_ mocapUI.mel	
                         |_ mocapRI.mel	

Information about customizing RfM and Maya can be found in the tutorial, "RfM: Customizing".


Maya Workflow

Generate Rib Archives

1.   Create a proxy object, for example, a poly cube.
2.   Select the proxy and run this mel command,
      mocapUI();
3.   Select the shape tab of the proxy to display the interface - figure 6.
4.   Browse for a "MoCap Data File".
5.   Ensure there is a RIB_Archive folder in your Maya project dirctory.
6.   Set an end frame in Maya's Render Settings.
7.   Run this mel commaand,
    rman genrib;
Maya's time line will "scrub" during which time rib archive files will be created in the RIB_Archive folder. Please note the scripts assume that a sequence begins with frame 1.


Render the Rib Archives

1.  Hide the proxy object.
2.  From the RenderMan menu select "Archives->Create Node".
3.  Browse for the first archive rib and set the Start/End Frame.


Figure 7


4.  Change the numeric extension, say,
    RIB_Archive/mocap/pCubeShape1/handspring_pnt_1_4_0300.0001.rib
    to $F4,
    RIB_Archive/mocap/pCubeShape1/handspring_pnt_1_4_0300.$F4.rib
5.  Assign a material via Custom Shading Group on the transform node.


Figure 8


6.  Finally, render and image and check if the baked geometry is correct.


© 2002- Malcolm Kesson. All rights reserved.