Figure 1
RfM
|
|
|
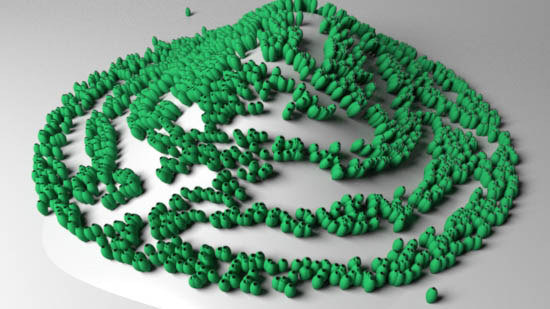
IntroductionThis tutorial presents five scripts that implement an interface that enables rib archives to be placed on a nurbs surface at postions that correspond to either a texture map or a procedural pattern. For example, figure 1 shows a few hundred simple cylindrical shapes placed on a distorted nurbs plane using a standard Maya "File" node that used the following map.
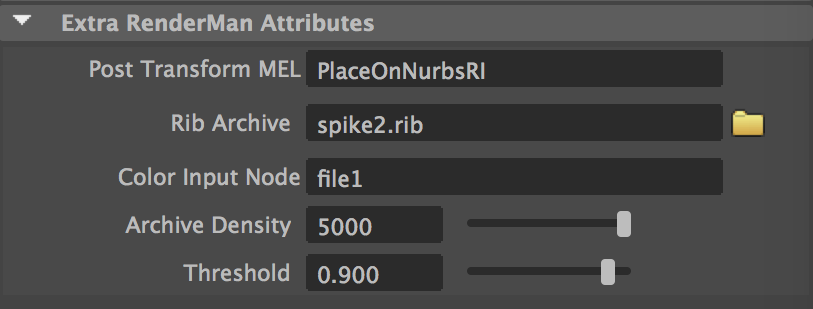
The UI that controls the application of the rib archives and sets the name of the File or other Maya node that generates the pattern is shown in figure 3.
|
Step 1 - Install the Scripts
It is assumed the reader has followed the recommendations on customizing
RenderMan for Maya presented in the tutorial,
"RfM: Customizing".
|
Step 2 - Using the Scripts
Launch Maya and check the RenderMan_for_Maya plugin is loaded. |
© 2002- Malcolm Kesson. All rights reserved.