Introduction
This tutorial demonstrates how two Ribboxes attached to two shading
groups can be used to create an effect that might be difficult or impossible to
achieve using Maya's standard tools. The workflow outlined in this tutorial
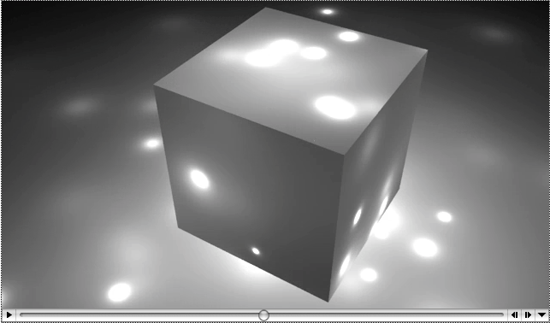
produced an animation of nearly 400 point lights "parented" to a particle system
- figure 1.
The reader should review the following tutorials,
RfM Ribbox: Volumetric Spotlight Effects
RfM Ribbox: Chain On Curve
Why Use Two Ribboxes?
Instancing a light at particle positions using TCL is not difficult - listing 1.
However, because RfM writes the rib information about a particle system
into an AttributeBegin / AttributeEnd block it means that lights
"created by" the particles have no effect outside of the block. For example,
AttributeBegin
    # List of lights created by a TCL script
    TransformBegin
        Translate x y z # position of particle 1
        LightSource "pointlight" 1
    TransformEnd
    TransformBegin
        Translate x y z # position of particle 2
        LightSource "pointlight" 3
    TransformEnd
    Attribute "visibility" "int camera" [0]
    TransformBegin
        ReadArchive "path_to_particle_archive"
    TransformEnd
AttributeEnd
# WOOPS! Previous lights are now INACTIVE
AttributeBegin
    TransformBegin
        ReadArchive "path_to_an_object"
    TransformEnd
AttributeEnd
Consequently, in order for surfaces to be effected by the "particle lights" they must have a
Ribbox assigned to their shading group or groups. The role of the additional Ribbox
is to inject into the rib stream a sequence of Illuminate statements that, in effect,
re-activate the lights parented to the particle system.
AttributeBegin
    ArchiveBegin "_ribbox_"
        Illuminate 1 1
        Illuminate 2 1
        ditto...
    ArchiveEnd
    ReadArchive "_ribbox_"
    # Now the lights in the particle Attribute block are ACTIVE
    TransformBegin
        ReadArchive "path_to_an_object"
    TransformEnd
AttributeEnd


