OSL
Multiple Textures I


return to main index


Related Tutorial

    Multiple Textures II


Code and Downloads

    AttributeTexname.osl


Introduction

This tutorial presents a way of randomly applying an arbitary number of texture maps to multiple surfaces using a single OSL shader. The technique relies on each surface being assigned a custom user attribute. For example, in RIB an attribute named "texname" would be of the form,

    Attribute "user" "string texname" ["1.tex"]

The value of the attribute is used by tbe shader when it calls the OSL texture() function. Figure 1 shows 48 cubes textured using the seven images shown in figure 2 .


Figure 1


Figure 2 - source images


The shading network shared by all 48 cubes is shown below.


Figure 3


Adding the Custom RenderMan Attribute

In Maya create an arbitary number of objects. Set the project and save the scene.

1     In the script editor execute the following mel proc.


global proc addAttributeTexname(string $texturesDir) {
    string $projpath = `workspace -q -rootDirectory`;
    string $texpath = $projpath + $texturesDir + "/";
    string $texnames[] = `getFileList -folder $texpath -filespec "*.tex"`;
    
    // We assume the node has a number in its name so that  
    // we can lock the random number generator
    string     $shapeNode = `rman ctxGetObject`;
    int     $nodeNumber = `match "[0-9]+" $shapeNode`;    
    if($nodeNumber != "")
        seed(int($nodeNumber));
    
    // Pick a texture
    int     $index = rand(0.0, size($texnames));
    string  $tex = $texnames[$index];
    RiAttribute("user", "string texname", $tex); 
    }

Now the proc has been loaded into Maya's memory it can be called as a Pre Shape MEL script using a Geometric Settings node.

2     Open the advanced renderman controls window.


Figure 4


3     Select the Geometric Settings panel from the View menu.


Figure 5


4     Create a Geometric Settings Node.
Click the Create and the Add/Remove Settings buttons. Scroll down the list of attributes and right mouse click on the Pre Shape MEL item to add it to the node.


Figure 6


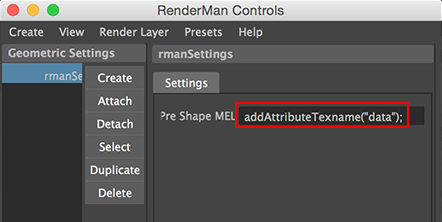
In the "Pre Shape MEL" text field enter the following text.
    addAttributeTexname("data");

The proc is passed "data" because this will be the directory in which the texture maps will be stored.


Figure 7


Select the objects to be texture mapped and click the Attach button.


Preparing the Texture Files

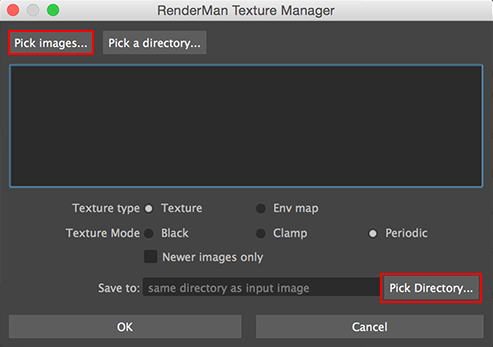
From the RenderMan shelf open the Texture Manager.


Figure 8


Use the Pick Images button to select as many image files you wish to use. Click the Pick Directory button to identify the directory in which the converted RenderMan textures will be saved.


Figure 9


The name of the textures directory in figure 7 ("data") must match the name of the folder chosen by the Pick Directory button. After clicking the OK button there will be a pause while the Texture Manager uses the txmake command to create the .tex (texture) files.


Compiling and Using the OSL Shader

The AttributeTexname.osl shader should be saved and compiled. In HyperShade create an instance of the PxrOSL node and browse the the compiled AttributeTexname.oso file. Connect the resultRGB output of the shader to the diffuseColor of PxrSurface - figure 3.

By default the shader will expect the location of the texture files to be the current project's "data" directory. The text ${RMSPROJ} will be substitued by RfM for the actual path to the current Maya project directory.


Figure 10


Unfortunately the current version (21.0) of RfM the PxrOSL node ignores the shader's metadata. Hence, 's' and 't' are not hidden and "invert" and "linearize" are not displayed as checkboxes!

For more information about using OSL shaders with Maya refer to the tutorial "OSL: Use in HyperShade".


Rendering

The successful operation of this technique depends on a couple of important factors.

Firstly, Maya's project directory must be set the scene must be saved. Secondly, the texture files have been saved by the Texture Manager in the directory specified in figures 7 and 10. Finally, the MEL script in listing 1 assumes the objects to which the custom attribute will be assigned have names that end with a number.


© 2002- Malcolm Kesson. All rights reserved.