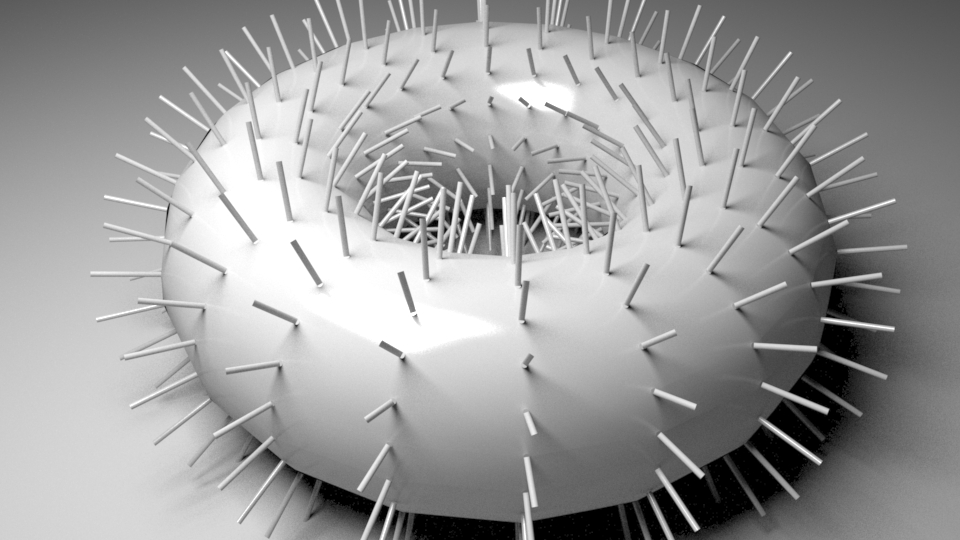
RfM
Python rif_mesh_normals


return to main index


Code

    rif_mesh_normals.py
    rif_utilities.py


Introduction

The python rif presented by this tutorial adds linear RiCurves to each vertex of a polymesh. Each curve is aligned to the average normal at each vertex. The calculations required to find the faces that share a vertex and the subsequent averaging of their face normas is performed by the VertexDB class of the module rif_utilities. The effect of the rif is shown below.


Figure 1


Applying the Rif in Maya

RfM does not provide a GUI that enables python rifs to be used in an artist friendly way. However, there is a work-around, but it assumes the reader has downloaded the scripts given in the tutorial "RfM 23: Customizing" and has reviewed their use for batch rendering outlined in the tutorial "RfM 22: Batch Rendering and Filtering".


Workflow

1     Download and save the following scripts in your,
      maya/rfm_scripts/python directory.
        rif_mesh_normals.py
        rif_utilities.py
2   Select a polymesh object that you wish to be rendered with it's normals.
3   Open the script editor (MEL tab) and execute the following commands,
      addFloatPrimVar("normals_mode", 1);
The addFloatPrimVar tags the polymesh for addition of the RiCurves.
4   To confirm the primvar has been added go to the Channels tab.


Figure 2


Note the name has automatically been given the prefix rmamcF. The prefix ensures the value will become primvar that can be read by the rif.

4   Execute the following python commands in the script editor (Python tab),

import batch
rif = [ 'rif_mesh_normals.Rif( 0.25, 0.02 )' ]
batch.render(1, 1 , rif)

The first arg (0.25) sets the length of the linear curves. The second arg sets the width (diameter) of each curve.


© 2002- Malcolm Kesson. All rights reserved.